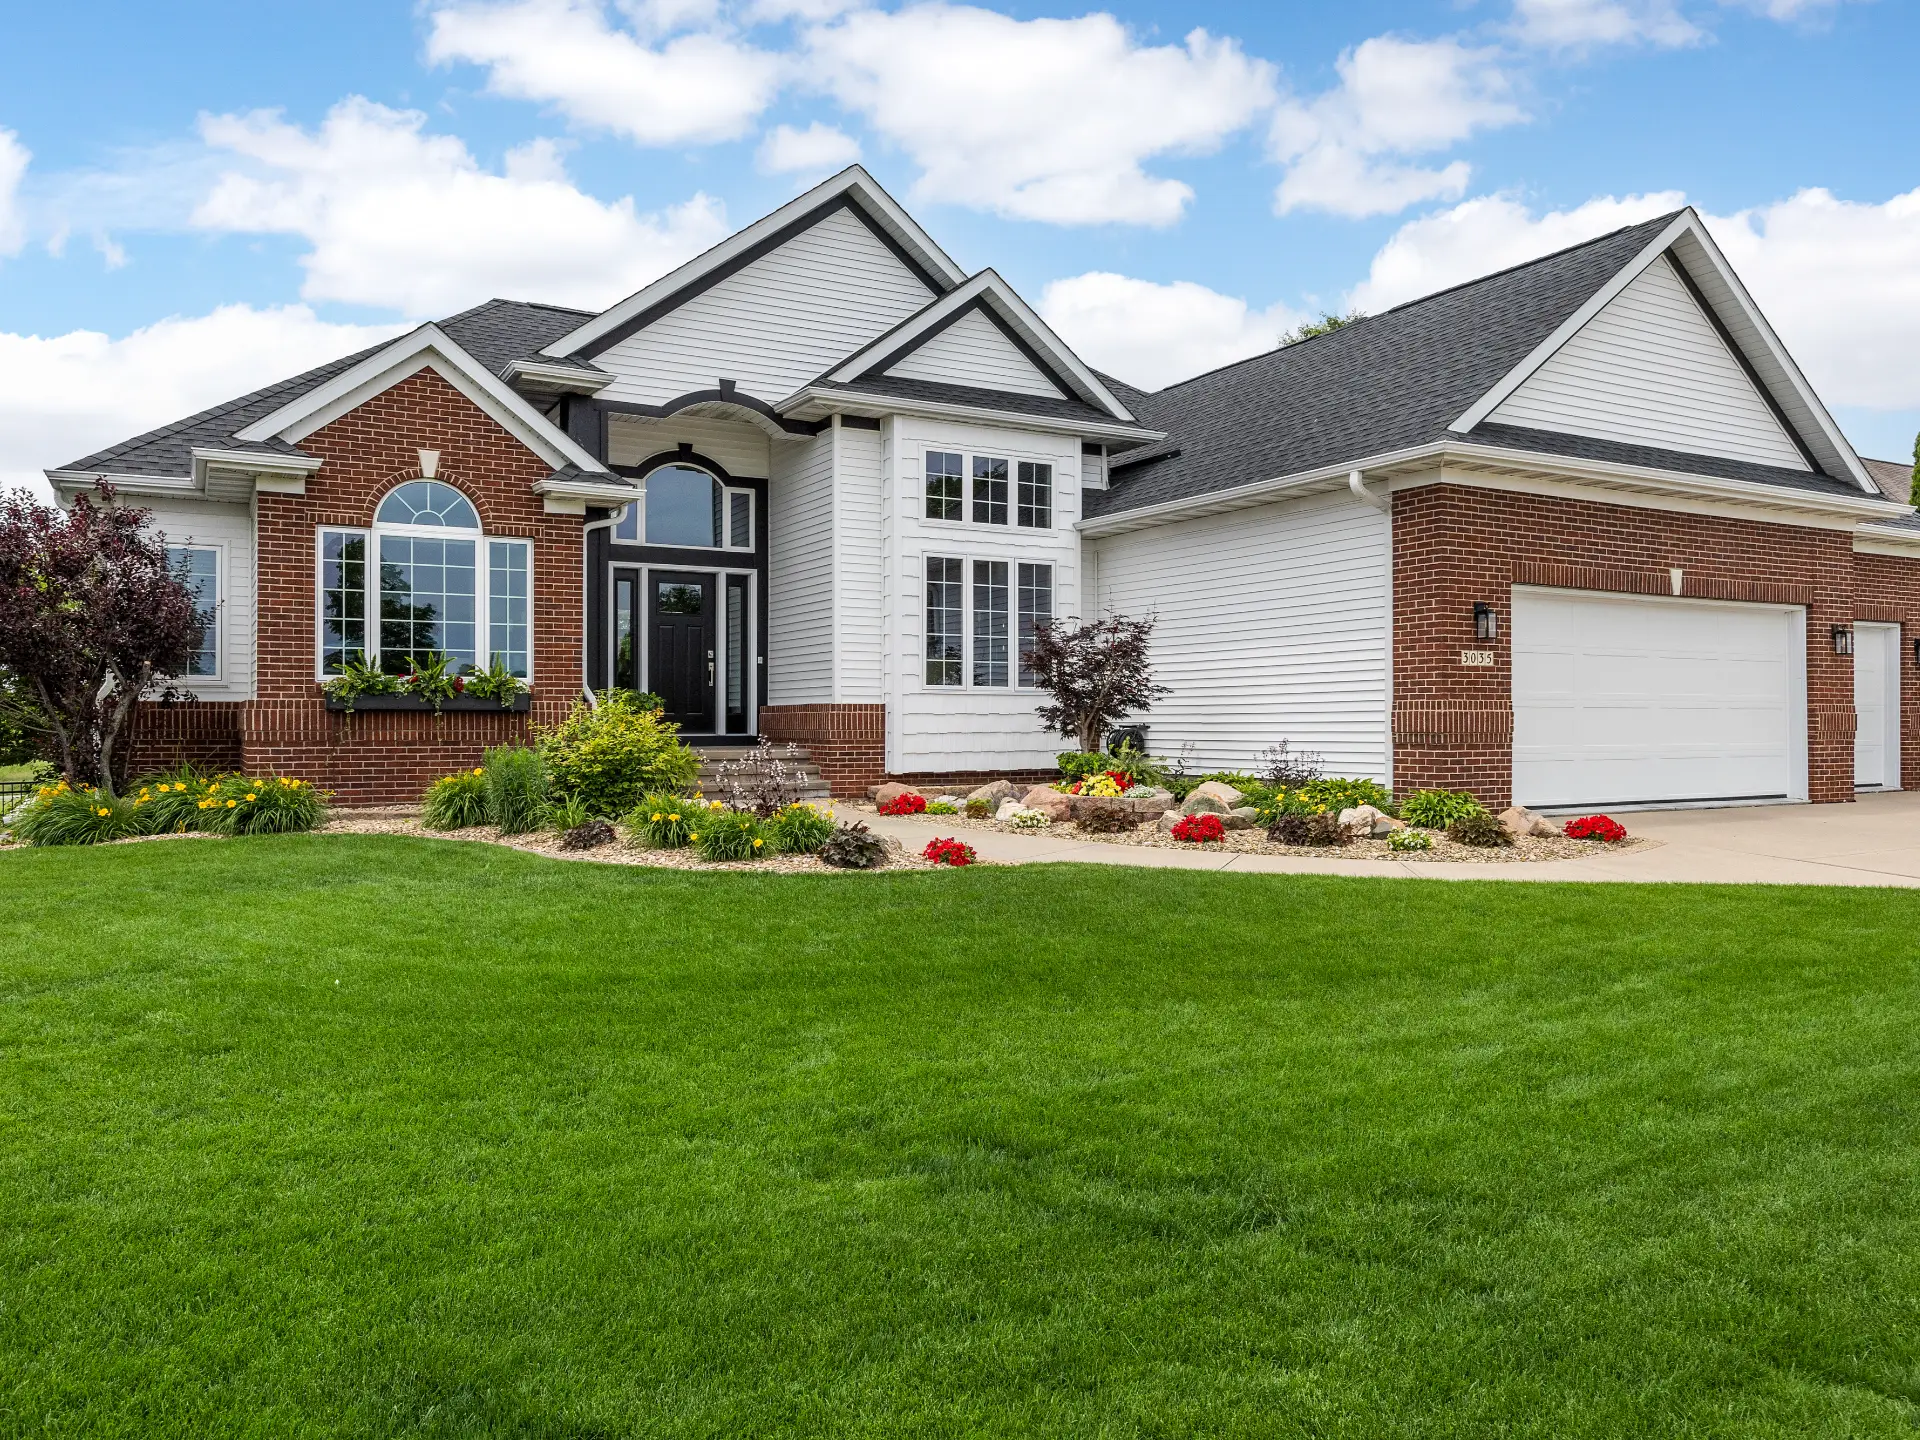
New siding can completely transform your home.
It boosts curb appeal.
It improves energy efficiency.
It protects everything inside your walls.
But when the process begins, there’s a question every homeowner asks themselves:
What exactly is going to happen during this project?
So this week’s StraightTALK is addressing this question and more. We’re answering the five questions homeowners ask us most about the siding installation process: cost, timeline, tear-off, hidden damage, and what you can expect day to day during your project.
How much does new siding cost?
The cost of new siding ranges anywhere from $15,000 to $45,000+ for most homes, or roughly $8 to $23 per square foot installed, depending on material choices and the condition of your home.
That’s a wide range, and we know that can feel frustrating. The final cost depends on your home’s size, the siding type you choose, the level of detail work involved, if you add on ancillary work like replacing soffits or gutters, and whether hidden repairs are needed once the old siding is removed.
A small, single-story ranch with minimal trim will land on the lower end. A larger two-story home with complex rooflines and premium materials will naturally fall on the higher end of the range. To better understand where your home may fall in the range, keep reading to learn what drives your cost toward the higher end.
What drives the cost of new siding?
Several factors influence the total investment cost of new siding. Some are obvious. Others aren’t visible until the project begins. Here’s what moves the needle most:
1. Material Choice
Vinyl siding generally costs less than steel. Premium siding materials or added benefits such as insulated siding increase material costs, but labor and prep remain consistent.
2. Tear-Off vs. Reside
Removing existing siding takes more time, while installing over existing siding may reduce your upfront cost. But it’s not always the right move (we’ll get to that next).
3. Trim and Detail Work
Homes with many windows, gables, dormers, and other architectural features require more cutting, fitting, and finishing.
StraightTALK Definitions:
- A gable is the triangular section of wall formed between two sloping sides of a roof, typically visible at the peak of a home.
- A dormer is a roofed structure that extends out from a sloped roof and usually contains a window.
- Sheathing is the flat layer of material (usually plywood) that covers the exterior wall framing. It provides structural support and serves as the surface to which housewrap and siding are attached.
4. Repairs Behind the Walls
Once siding comes off, we sometimes discover rotted sheathing or moisture damage. That repair work affects the final cost. But it’s well worth fixing it now. A reputable siding contractor will not just cover up these types of issues; they’ll resolve them with you.

Why do siding estimates vary so much?
If you’ve collected multiple bids, you’ve probably noticed something surprising: the numbers can be thousands of dollars apart. It’s important that you ask any questions that you have about any estimates. This way, you can better understand what is included and what’s not included so that you can truly compare from quote to quote.
One contractor may include a full tear-off in their estimate, while another plans to install new siding directly over the existing material. That difference alone can significantly impact costs and long-term performance.
Warranty coverage is another major variable. Some estimates include manufacturer-backed warranties plus workmanship coverage. Others offer minimal labor warranties, leaving homeowners exposed if problems arise later.
You may also see differences in insulation upgrades. Some proposals include insulated backing or foam board to improve energy efficiency and wall flatness. Others price only the siding panels themselves.
When you see large price gaps, it’s usually because the scope and quality of the work aren’t truly the same.
StraightTALK Budgeting Tip
When comparing siding estimates, make sure you’re comparing apples to apples. Look closely at whether each proposal includes:
- The same material and thickness
- The same tear-off scope
- The same trim replacement
- The same warranty coverage
It’s easy to gravitate toward the lowest number on paper. But the lowest bid often reflects reduced scope, lower quality materials, or limited warranty protection. New siding is your home’s protective shell. Make sure you’re making the best decision for your home and lifestyle.
Can you reside over existing siding?
Yes, in some cases you can install new siding over existing siding, but whether you should is a different question. This is one of the most common questions we hear. The logic makes sense: “If we don’t have to remove the old siding, we can save money… right?”
Sometimes, yes. But sometimes it creates bigger problems down the road, which could be corrected now, while you’re already repairing your home.
When Residing Might Be Possible
Installing new siding over existing siding may be an option if:
- There is only one existing layer
- The current siding is structurally stable and flat
- There are no signs of moisture damage
- Local building codes allow it
In these situations, residing can reduce costs by eliminating the tear-off phase. But skipping the tear-off also means skipping a full inspection of what’s underneath your existing siding.
When Residing Is Not Recommended
Residing is generally not recommended when:
- There are multiple existing layers
- The current siding is warped, soft, or deteriorating
- There are visible water stains or mold concerns
- The home has moisture issues around windows or rooflines
Adding another layer to compromised materials can trap moisture within the wall system. Over time, that can lead to rot, structural damage, and costly repairs. Sometimes the cheapest upfront option becomes the most expensive long term.
Tear-off vs. reside: what’s the real difference?
A full tear-off does more than remove old siding. It allows us to:
- Inspect the sheathing for hidden damage
- Repair rot or insect damage
- Install updated house wrap
- Flash windows and doors correctly
- Create a flat, properly prepped surface
When we tear everything down to the sheathing, we can rebuild your home’s exterior envelope the right way. Residing, on the other hand, limits that inspection process. We’re assuming everything underneath is in good shape.
Sometimes that assumption is safe. Sometimes it’s not. The only way to know for sure is to evaluate the condition of the existing siding and what signs it’s showing.
StraightTALK Remodeling Tip
If your current siding is older, showing wear, or has signs of moisture problems, a full tear-off is almost always the smarter investment. If your siding is relatively new, structurally sound, and you’re upgrading primarily for aesthetic reasons, residing may be a viable option.

How long does it take to install siding?
The time required to install siding depends on your home, but a typical installation takes about one to three weeks from start to finish for an average-sized home under normal conditions.
But siding isn’t like swapping out a faucet or even replacing an exterior door. It’s a full exterior transformation. Several factors influence how long your specific project will actually take.
The size of your home is the biggest driver. A small, single-story ranch will move much faster than a large two-story home with multiple elevations. The number of stories matters because additional height requires more setup time and safety measures for the crew.
Architectural complexity also plays a role. Homes with dormers, gables, bay windows, decorative trim, and multiple rooflines require more precision cutting and detailed finishing. More detail means more time and cost.
Material choice can also affect the timeline. Some materials are lighter and faster to install. Others require more precise fastening and spacing. While the difference isn’t drastic, it can add a few days depending on the scope.
And finally, weather and unexpected repairs can extend the schedule, which we’ll talk about in a moment. The important takeaway is this: timelines are estimates. A good contractor will provide a realistic range and clearly communicate if anything changes.
What time of year is best for siding installation?
At Hometown Restyling, we install siding year-round. While spring and fall are traditionally the busiest seasons due to mild temperatures, there’s no “only right” time to replace siding.
Summer offers longer workdays and consistent conditions, but schedules fill up quickly. Winter installations are absolutely possible, and often come with shorter lead times. Certain materials require temperature considerations during installation, but experienced crews like those here at Hometown Restyling know how to work within those parameters.
In many cases, the best time to install siding isn’t about the calendar; it’s about when your home needs it. If your siding is failing or allowing moisture in, waiting for a “perfect” season probably isn’t the best decision.
What can delay a siding replacement project?
Even with careful planning, delays can happen. The weather is the primary factor. Heavy rain, high winds, or severe storms can temporarily pause work. Safety for the crew and your home always come first.
Sometimes, once the old siding is removed, we discover structural repairs that must be addressed before moving forward. Repairing damaged sheathing or framing is essential to protect your home over the long term, but it may slightly delay the project.
None of these situations are unusual. A good contractor will communicate with you clearly and often. You should never be left wondering why your project has slowed down.
StraightTALK Remodeling Tip
If timeline is a major concern for you, whether it’s an upcoming event, travel plans, or weather worries, talk about it early.
A clear pre-project conversation about expectations, scheduling flexibility, and contingency planning can prevent frustration later.
What if you come across rotted or damaged sheathing during siding installation?
If we encounter rotted or damaged sheathing during your siding project, we will stop, document it, show you exactly what we found, and repair it before installing new siding.
This is one of the biggest unknowns for homeowners, and understandably so. When you look at your home, you see siding. What you don’t see is the structure underneath it. And until that outer layer comes off, no one truly knows what condition the sheathing is in.
In many cases, everything is perfectly solid. But sometimes, especially in older homes or those that have experienced moisture intrusion, we uncover issues that require attention before new siding can be installed.
Common things we find include:
- Rotted plywood
- Water infiltration around windows and doors
- Improper or missing flashing
- Soft spots near rooflines or gutters
Finding damage doesn’t mean something went “wrong.” It usually indicates that the old siding system has reached the end of its life. And it’s time to repair or replace.
What happens when damage is discovered?
At Hometown Restyling, when we discover damage, we address it, just like we would with our own homes. We pause the installation process and document what we’ve found. That includes taking clear photos and identifying the scope of the issue.
Then we walk you through it.
We explain what’s happening, why it needs to be addressed, and what the repair will involve. You’ll receive a clear description of the work required, along with the associated cost, before anything proceeds.
Structural repairs must be completed before new siding is installed. Installing siding over compromised sheathing would only trap moisture, allowing the problem to worsen over time.
Our goal is to leave your home stronger than we found it, not just better-looking.
How do you protect the home from moisture?
Moisture protection is one of the most important and most overlooked components of the siding installation process.
Siding itself is not the primary waterproofing layer of your home. The real moisture protection happens in the layers beneath the siding. That’s why quality siding installation is more important than the materials chosen.
A properly installed siding system includes:
- High-quality house wrap
- Correct window and door flashing
- Sealing around penetrations (lights, vents, outlets)
- Proper fastening techniques
- Correct expansion spacing for the material
These steps create a drainage plane that allows moisture to escape rather than becoming trapped within the wall system. When done correctly, your home can breathe while staying protected. When done poorly, even the most expensive siding can fail before it should.
This is why installation quality is the difference between cosmetic improvement and structural protection.
StraightTALK Remodeling Tip
When interviewing siding contractors, don’t just ask about the materials and cost.
- Ask how they handle hidden damage.
- Ask how they install flashing.
- Ask what moisture barrier system they use.
The right contractor understands the entire home envelope and knows how to protect what’s behind the walls. It’s about safeguarding your home for decades to come.

What should I expect during the siding installation process?
Now, let’s walk through what the siding installation process actually looks like day to day for an Eastern Iowa homeowner.
Step 0: Consultation and Design
Before any siding comes off your home, the project starts with planning. This is where you will start to gain confidence in a good siding installation team.
This step typically includes:
- Measuring and evaluating the exterior (including existing siding condition)
- Discussing your goals: curb appeal, durability, efficiency, and maintenance level
- Reviewing siding styles, colors, trim options, and accents
- Identifying potential problem areas (windows, rooflines, gutters, moisture concerns)
- Confirming scope: tear-off vs. residing, insulation upgrades, trim replacement
- Finalizing the quote, timeline, and what to expect next
This is also a great time to ask questions, because a good plan upfront helps the actual installation go smoother and avoids surprises mid-project.
Step 1: Pre-Installation Preparation
- Materials are delivered
- Dumpster arrives
- Landscaping is protected
- Safety setup begins
You’ll know the start date in advance.
Step 2: Tear-Off Phase
This is the loudest part. Crews remove existing siding, inspect sheathing, and prep the surface.
Yes, it’s noisy.
Yes, there will be debris.
Depending on many factors including your unique home and the weather forecast, this phase may look like tearing off one side at a time, or we may decide to tear-off the whole home at once. Either way, it’s important to know that even if a portion of your siding is removed and not replaced in the same day, we (and any reputable siding contractor) will house wrap your home directly after any tear-off. This will help prevent moisture intrusion during the remainder of your project.
Professional crews like ours at Hometown Restyling perform daily cleanup and keep the job site organized to respect your home and life.
Step 3: Inspection & Repairs
Once siding is removed, the underlying structure is inspected. If repairs are needed, you’ll be notified before work continues.
Step 4: Moisture Barrier & Prep
House wrap and flashing are installed. This stage is critical but often goes unnoticed once siding is up. It’s the layer that protects your home long term.
Step 5: Siding Installation
Trim is installed first, followed by siding panels. Crews carefully measure, cut, level, and secure each section. Detail work around windows and rooflines takes time and craftsmanship to perform at the highest standard.
Step 6: Final Walkthrough
When installation is complete:
- Debris is removed
- Grounds are magnet-swept for nails
- A final inspection is conducted
- Warranty information is reviewed
Will this disrupt my daily life?
Temporarily, yes, it will. You can expect:
- Noise during work hours
- Limited driveway access at times
- Safety considerations for pets and children
But most siding projects do not require interior access. Crews work outside. Your daily routine inside the home typically continues uninterrupted.
Do I need to be home during siding installation?
You likely don’t need to be at your home the entire time that the crew is working. But, you’ll want to be available by phone in case questions arise. Homeowners usually continue working during the project. But open communication is still valuable, so talk to your crew lead and others about what makes the most sense for your project.
StraightTALK Wrap-Up
The siding installation process is an investment (financially and structurally), and you deserve to know exactly what’s happening before it starts.
Here’s what we covered:
- The cost of new siding and what drives it
- Whether you can reside on existing materials
- How long does siding installation take?
- What happens if damage is discovered
- What to expect from start to finish
New siding should protect your home from moisture, improve efficiency, and give you peace of mind in your home. And when you understand the process, the entire experience becomes a lot more predictable.
If you’re considering siding replacement and want straight answers about your specific home, the best place to start is a conversation. Or if you want to learn more about siding replacement, check out: 5 Things to Consider When Replacing Your Siding.